Installing SDK drove me crazy on Ubuntu. The steps weren't clear enough in the official guide and somehow I got off track and got lost in all those steps. Plus, all the "help" on Google was meant for windows. So now that I've finally figured it out, I thought I'd help the rest of you out there who want to install it on a Linux OS, complete with screen shots. After installing, I realized that the steps are pretty much the same for windows, except I was saved from an extra step in the end: installing USB drivers for windows.
Step 1. Download the SDK tools
You can download the latest version of the SDK starter package here. Once downloaded, extract it. If you move the location of the extracted content later, you'll have some complications, so better choose a location which can be permanent.Step 1. Download the SDK tools
Step 2. Install Eclipse
This programming software can be installed from the Ubuntu Software Centre. Simply search, download & install.
Step 3. Installing the ADT plugin.
The Android Development Tools (ADT) plug-in is going to "connect" your SDK tools with eclipse; allowing them to open. You have to install it in Eclipse.
1. DOWNLOAD:
Open Eclipse. In the Menu bar, click Help >Install new Software.
Once opened, click Add at the top right corner.
A window should pop open like the one below:
In Name: type in
ADT Plugin
In Location: type in,
http://dl-ssl.google.com/android/eclipse/
Once you click OK, you'll see Developer Tools in the dialog. Select the checkbox next to it and click Next.
In the next window, you'll see a list of the tools to be downloaded. Click
Next.
Read and accept the license agreements, then click Finish. Once the installation is complete, restart Eclipse.
2. CONFIGURE:
Back to Eclipse.Go to Window > Preferences... .Select Android from the left panel.
Next to the SDK Location field, click Browse... and locate your downloaded SDK directory. Click Apply, then OK.
Step 4. Adding Platforms
Open up the SDK & AVD manager.
You can do that in two ways:
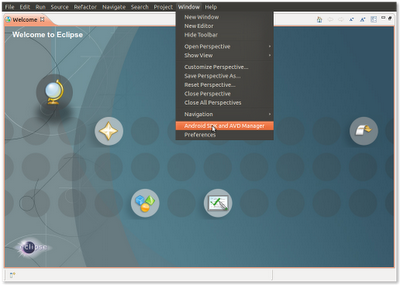
1. Open up Eclipse. Go to Window> SDK and AVD Manager.
2. Go to the SDK package that you had installed in the first step. Open up the Tools folder> android
Once its opened up, click on Available packages in the left panel.
Click on the arrow with Android Repository. Select the checkbox next to the android platform that you want to develop for. Preferably select the version your own android phone uses.
Once you've selcted it, click Install Selected.
Step 5. You're Done!
Now that you're done, you can start exploring and using the developer tools provided. To understand the tools and basic programming go to the Android developer guide or to the SDK installation guide.
Try taking screen shots of your android phone. Click here to learn how-to.
This content is owned and copyrighted by http://greenfridge.blogspot.com
Try taking screen shots of your android phone. Click here to learn how-to.
This content is owned and copyrighted by http://greenfridge.blogspot.com


No comments:
Post a Comment